Craftsman 28 4 Drawer Tool Chest
How To Reach A Awkward Tool case With Pants
Build A Wooden Tool cabinet of Drawers
A great storage solution for small parts and tool storage
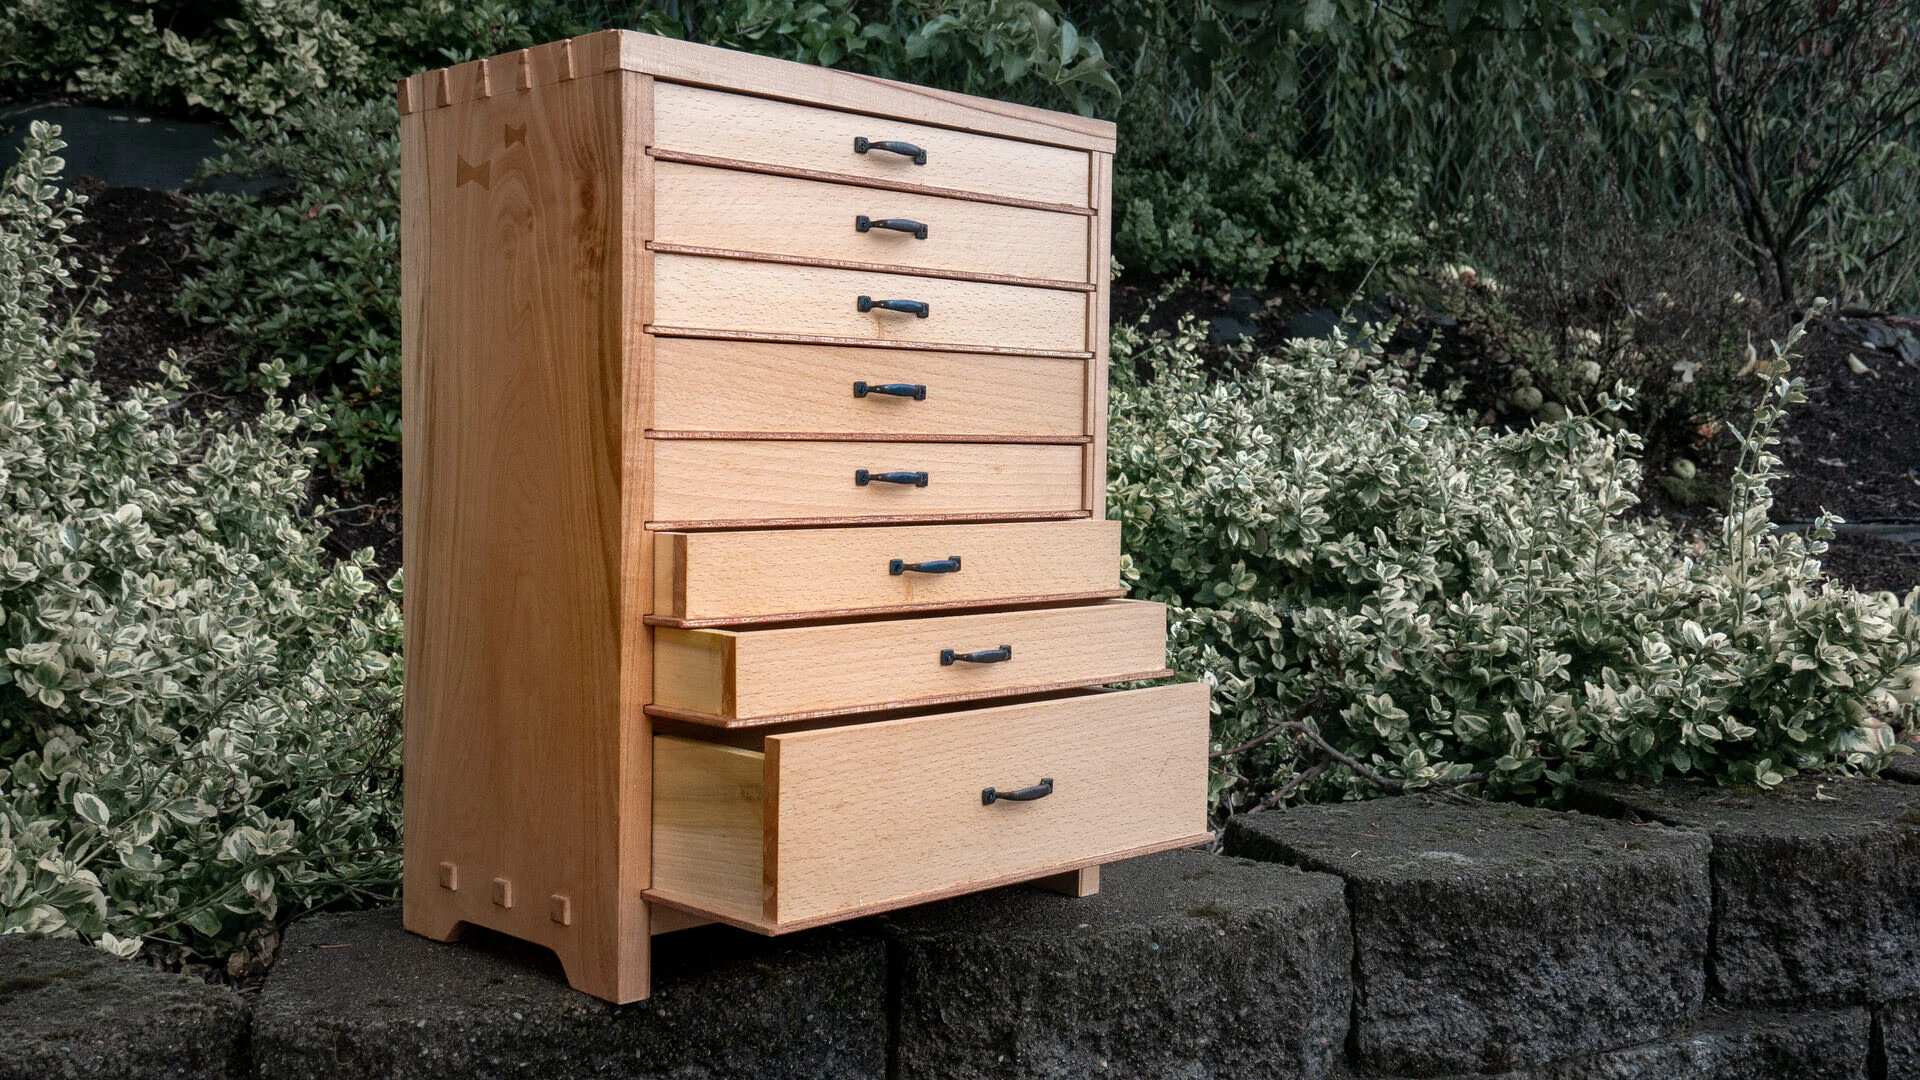
A wooden toolbox of drawers makes a very cost-effective and beautiful way to organize your tools and your shop.
I'm a shop pig. Whatsoever horizontal surface to Be had, is probably cluttered. Thus I wanted to make a small nick in my mess, with a tool chest. This clause shows you how I collective one, and how you can build one too.
If you'd like to well build ace yourself, I have careful woodworking tool pectus plans available in my shop.
Serious quick , if you haven't already, don't leave to follow Craftswright &A; Makery on YouTube , Facebook , Instagram and Pinterest to keep up with all of the latest projects and plans!
Consort links are used connected this page. Understand my disclosure page for info on affiliate programs.
How to Build A Teeny Awkward Tool Box:
-
Dimension Material
-
Layout and rough cut pieces
-
Event Cabinetmaking
-
Pre-stopping point Case
-
Assemble The Tool Chest Cabinet
-
Drawer Construction
-
Wind up TOUCHES
-
Store your tools!
Orientating Material for The Puppet Pectus
For this project I purchased some gruelling duty 5/4 soft red maple from my local sawyer.
Imbricated-sawn lumber is a great way to save a little extra money and have more mastery over your generate, only you do pay for the savings in parturiency when information technology comes clock to surfacing and dimensioning your Malcolm stock.
Sometimes I choose to spend a lilliputian extra $$$ for S3S (surfaced three sides) log and save myself some time. Either way works perfectly fine.
I poor down the baseball bat into more manageable pieces with a jigsaw (a good handsaw will work great also) before ripping the stock to width at the bandsaw.
Rough sawn lumber is almost never perfectly categorical or square. That's wherefore it's ordinarily recommended to break IT down with a bandsaw/jigsaw/hand-held circular sawing machine. It helps avoid kickback and is much safer.

A jigsaw turns interminable, un-wieldy, lumber into short and manageable pieces fast.
The band saw is one of the safest shipway to rip rough-sawn lumber.
My long plane only has a 6" capacity so some of the stock I required to surface with a planer sleigh.
The otherwise, little farm animal, I surfaced commonly past jointing one face and unmatchable sharpness, then planing the opposition face up before taking the live on rough edge to the table saw.
The table adage is safe at this point since I have a very flat face and a same upright edge to reference off of the tabular array power saw debate.

Action shot of the jointer flattening single face of the board.

With unrivalled face flat, I can reference point it off the jointers fence to wholesome and flatten an edge.

I gave myself a hand planing the stock. You can see Hera the planer sledge underneath the lumber.
Laying out Tool Chest Parts connected Stock
Referencing the snub list in my plans (on hand here) I played out a good while laying out my pieces sol I seat get the best yield and food grain match realizable. I same to use trash to do this because it doesn't permanently mark the wood. If you mess up all you have to do is wipe and repeat.
The plans still are laid out for box joints but changing them to dovetails and adding a through tenon, or faux-tenons, isn't very difficult. Do whichever you'Re most comfortable with.
Sample of the DIY Bittie Tool case plans, showing the box joints originally planned.
Make the Toolbox console Cabinetmaking
With all of the stock nicely squared, flat, and with the parts laid prohibited I could cut individual pieces out at the table and miter saw.
The top and bottom pieces of the suit I leave a few inches thirster than they need to be. This way if I good deal up one side I have adequate material to trim the mess-up off and start again.
It's never a bad idea to leave a microscopic squirm room.

Parts for the tool bureau can now be unsexed from bigger stock at the table proverb.

I deletion the parts to length at the miter power saw about 1/16" proud.
Later to each one new cut at the miter saw, I straightarrow the ends of the piece with a hand shave and shooting board.

I'll remove the spear carrier 1/16"with a handwriting plane and shooting board, which will also assure the ends of my stock are perfectly 90º.
To put over out the proud dovetails I add the vane of a combining square to my stock before dropping the marking gauge. This gives me just about 1/8" "proudness" to the joints; common among Arts & Crafts furniture.

Marking gauge ready to reference stock thickness with added combo straightarrow.

Dropping the wheel down to the adjacent board gives a perfect width addition ~1/8".
Now when information technology comes to dovetails, there are a TON of awing and highly qualified resources out on that point connected the cyberspace showing you how to cut down accurate and great looking dovetails.
For the sake of brevity, I'll skip over the "how to rationalize dovetails" section of this anatomy (American Samoa I also did in the video) but I will give you some nifty tips and tricks I like.
I stack two boards together so I tooshie cut two sets of tails a once. A pleasing set of wing dividers makes laying proscribed dovetails a bit easier.

Wing dividers assist put on out symmetrical dovetails.
I like to running my angular tail guide lines extra long for the tails and pins. I find the extra line length helps Pine Tree State line my proverb up with the angle easier and keep to the angle.

On that point's something really special about acquisition to cut dovetails completely past hand down, but if I haven't cut them in a while, or I don't want to messiness my stock up, I'll use the Katz-Moses Dovetail Jig. I'm not affiliated with Toilet, I just similar his product and mean it can help a lot of woodworkers to obtain comfortable thinning dovetails.
Some of the dovetail "tricks":
-
Cutting two boards and two sets of tails at once.
-
Chiseling out the waste by halving the waste until my rip off lands in the marking judge groove.
-
Strop your chisels. Very much. I've constitute that by stropping after every 2-3 chops keeps the cheat sharp and me enjoying my hand tool for a very long time.
-
Just be sure non to strop the posterior (you'll round the chisel) and try non to round over the advanced bevel when stropping.
-
-
Blue tape trick for the pin room that I learned from Mike Pekovich of Fine Woodwork's book (I highly, highly advocate).
-
And in conclusion, disposable usefulness knives to mark/cut the pin plank. They'ray thin, long, inexpensive and usable in a way that I'm cool with. You can commit the metal bits in a "sharps" container, then recycle the plastic with your other household recycling.

I use a Japanese pull proverb to cut two tail boards at once.

I chisel away the permissive waste by impermanent my way up to the marking line.

Disposable utility knives make great dovetail marking knives.

A coping saw makes removing the waste with a chisel easier.

I strop my chisels A Band. Virtually every 2-3 chops.

Blueness tape measure makes cutting the pins very accurate and easy.
Future I make out the dados in the causa sides at the table saw. These wish play the runners for the drawers to slide along. Make predestined to practice intellectual, sound, tabular array saw safety here.
One neat thaumaturgy if you don't have a crosscut sled, or your miter gauge for you table saw isn't really long, is to flip out your mitr gauge around. This bequeath help get the cut started accurately and square.

A turned mitre joint gauge can help with extensive stock. Consult your proprietor's manual beginning.

Cutting the dados for the draftsman runners.

Top view of the finished and mirrored draftsman slide dados. The plans provide greater detail on how to trend these.
Since this isn't a portable tool locker with wheels, I hot to cut down a minute section of the sides to give the tool chest the illusion of having feet.
I did this by marking out the curve that I liked, cutting unitary position out at the bandsaw, refining the undercut with a rasp and card scraper, then transferring that line to the other side and repeating the work.
The through-tenon idea of the tool box only came to me aft I had already cut my stock to length. I didn't have anymore at the proper width and I didn't want to glue risen a panel. Using faux through with-tenons solved that problem.
I placed blue painters tape on the case sides so that I had a liquid place to home run my references happening. Using a grading overestimate and book of fact materials instead of measurements makes the process straightaway and identical accurate.
This is easier to explain through video, or the pictures below.

I mark one side of the half-mortise from one side.

Tenon material placed between marking gauge and previously marked transmission line.

Then mark the other half-mortice from the other side.

Removing the tenon material, I can now fall guy a perfect breadth mortise.
I used a router and a helical up-cut bit to quick remove the waste material in the half-mortises, making predestinate to stay proud of the marking lines, before cleansing up the waste with chisels, stropping much 😉

Routers produce clearing the waste from a mortise quick and easy before purification with a chisel.
I mark my joints with roman numerals on inconspicuous places, like the back of the carcass. They won't vanish with sand paper or a bill scraper like a pencil German mark wish, and they lend a "handmade" look that I find really charming.

I mark off coupling pieces with chiseled in Roman numerals placed at inconspicuous locations. They South Korean won't circumstantially disappear like pencil and they lend a handmade look.
Since my dovetails are proud, meaning I won't comprise flushing them flat, I thinly bevel and clean dormie the edges with sandpaper spray-mounted to MDF.
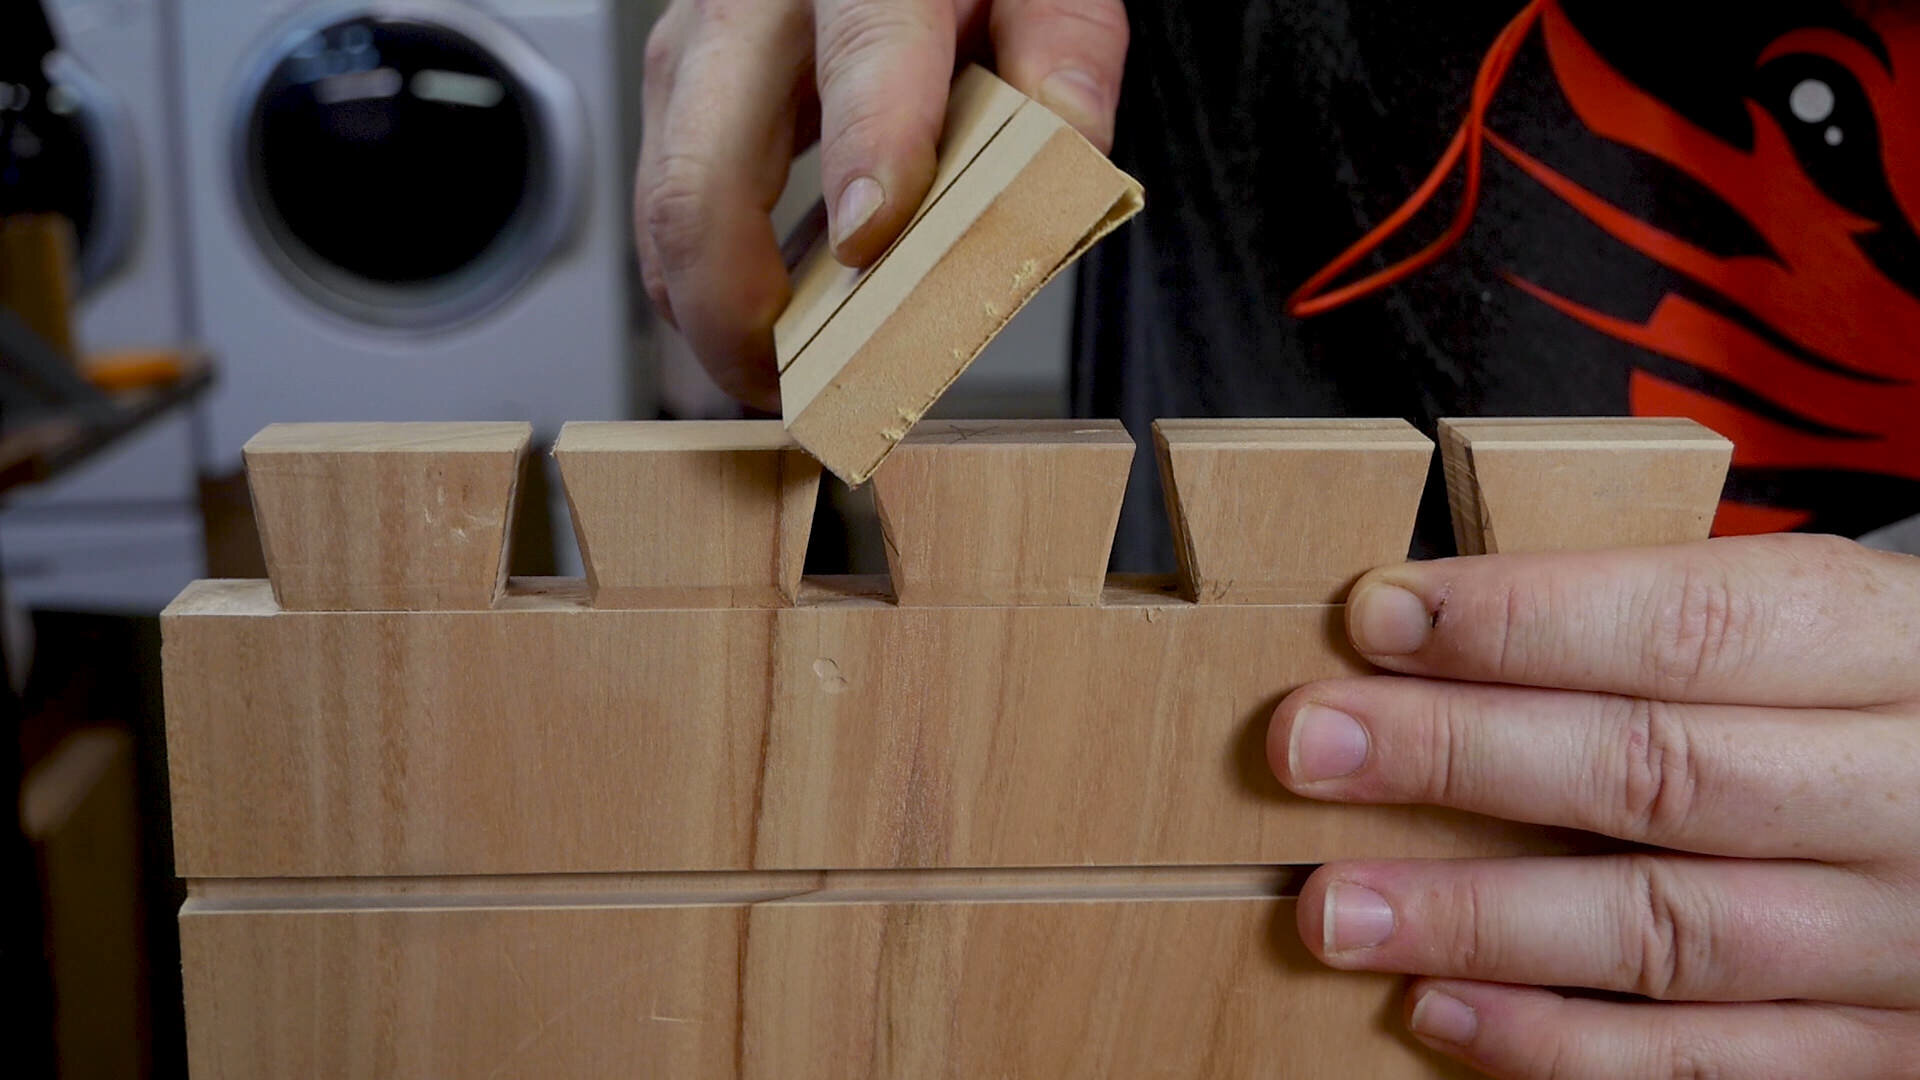
I lightly chamfer the tails and pins.

Sandpaper glued to MDF makes a great tool for chamfering dovetails.
The last step ahead glue up is to cut the rabbet for the case's back plywood panel. To do this (since I don't have a rabbeting bite) I used a router and a straight traffic pattern bit to follow a simple MDF straightedge. The beauty of this proficiency is I can just trace up the MDF with my line, clinch it toss off, place my moment depth and go! No measuring.

3/4" straight pattern bit with bearing.

Action shot of rabbet being deletion, approach pattern fleck is following MDF straightedge.
PRE-Coating THE CASE
Pre-finishing keeps the project clean and humming along. It protects your closing pieces from dirt and fingerprints, it makes glue up a breeze since squeeze out won't want to stick as a lot to dressed wood, and IT makes the finishing work on less of a chore since you're doing bits and pieces of it as you go.
Before applying finish, I'll prep my stock past using a card scraper to get everything nice and sinuate.

A card scraper, in my opinion, is faster than sanding and leaves a much nicer finish.
Handily, my favorite finish, is Osmo Poly-x Oil. I have a full TV HERE explaining why I lovemaking this product so much (not sponsored by Osmo).
Try not to apply finish to anywhere at that place will be a glue joint. Like the insides of the dress suit and pins, simply feel free to last the end-grain on those, you'll thank yourself after glue-up.

I masquerade party off any areas paste needs to make contact with the wood.

Applying 2 coats of Osmo Poly-X Oil aside hand.

Pre-finishing the remainder-grain helps stop glue from seeping in, which can be a real pain.
Joyride Chest of drawers Case Assembly and Glue Up

Assembly is pretty straightforward. I put the case unneurotic by applying glue to the insides of the pin-board only before adding the arse board. This way you're driving glue to the inside of the case, instead of the pins pushing glue that you've applied to the tails, out.

Scrap MDF does a good task of buffering the case side as I tap the dovetails home with a beetle.

Since the dovetails are proud, some scrap cauls help apply pressure where it's needed.
The most critical part of any case build is making sure that the case itself is square. If non, you'll play hell disagreeable to get everything other to convulsion and operate right, particularly drawers and doors.
My favorite way to check for square on a display case or box build it so to use a set of squaring sticks. They ensure there's no racking and zero measurement error on my part.
Again, always trying to citation or else of standard. It's just more than precise.
I have a set of plans to body-build your own squaring sticks HERE, and a video explaining what they are and how to use them HERE.

Squaring sticks are an invaluable way to make a point your case build is utterly square.
Making the Drawers for the DIY tool case
The drawers for this project are of a very simple design. The bottoms act the slides, running in dados, while the front, back, and sides are simple butt joints glued to the bottoms.
You could easily realize these boxers as fancy as you want, but somehow I find this method acting elegant in its simplicity and for storing young tools it's mass strong.
The early matter I did was cut the drawer bottoms to size from 1/4" plywood. Then after those bottoms are in place (I lightly cant the edges with sandpaper), I could meter from 1 draftsman bottom up to the next for the face/side/back heights.
The 1/4" drawer bottoms are easy to cut at the hold over power saw.
Draftsman bottoms in situ makes measurement for drawer parts easy.
With those measurements in hand over I cut the drawer fronts to rough size then refined the fit with a hand planer until I achieved the reveal I wanted.
With the fronts cut, I could cut the poplar backs and sides.

Cutting the beech drawer fronts to length at the miter saw.

Cutting the beech drawer fronts for the tool case to width at the table saw.

A hand plane makes refining the draftsman fronts very easy.

Once I had the reveal I wanted, I could use information technology as a reference to take in the sides and backs.
I predrilled the holes for the draftsman pulls using Jimmy DiResta's method for finding the pull in hole locations. This is easier to execute while the drawers parts haven't been assembled yet, that way you can lay them perfect flat. IT can still be done with assembled drawers, information technology's fair-minded a hair harder to do.

Drilling pull trap locations while draftsman parts are still disassembled.
To assemble the instrument box drawers, glue the poplar backs and beech fronts to the poplar sides, then to the plywood drawer bottoms, leaving sufficient space on either side of meat for the draftsman to slide. Squaring sticks help once more to make predictable the drawer is square and symmetrical.
With the drawers glued to the drawer bottoms, I could slide it them into their places and make sure the space was right ahead clamping it down.
I also left the plywood bottoms a little gallant depth-wise so I could glue the ensnare of the drawers flush with the back of the bottoms then trim the surfeit plywood in the movement.
With the drawers assembled and in situ I finished them 2 coats of Osmo Poly-X. I'm not just sure wherefore I didn't pre-finish the drawers and blest that until after they were finished, merely it worked out conscionable fine.

Putting The Coating TOUCHES connected the Creature Chest
With totally the hard turn directly cooked, the last things to do on the DIY Tool Bureau are pretty straight forward.
I cut the faux-tenons with a handsaw and square off each remnant with a hand plane at the shooting board before cutting the next chunk of wood.
With complete of the faux-tenons cut, I arranged a small dollop of glue in the incomplete-mortises and drove the tenons home, making sure they were 90º to the case side.
Fake tenons aid cover up the screws that bond the event bottom to the sides and add u any visual interest group.
After they dried, I trimmed them downcast to match the proud dovetails and then chamfered the ends with a chisel.

I old a scrap piece of plywood to keep my saw elevated from the workpiece as I trimmed the faux-tenons.

Turn from the outside in when chamfering with a cheat so you don't tear forbidden a corner.
Living unreal a hipster city has its perks, like having a time of origin ironware store nearby. These drawer pulls are from the 19-teens and came from a big cabinet shop in Portland that went out of business later on World State of war 2.
Something about how they didn't rather healthy the aesthetic perfectly was appealing to me. Almost suchlike taking a actually classy collectible machine and putting a doofy bumper sticker on it. Shows that the person driving (or making in this case) is human.
All hipster joking aside, if you're in the Portland country have sure to stop away Old Portland Hardware. Beautiful store.
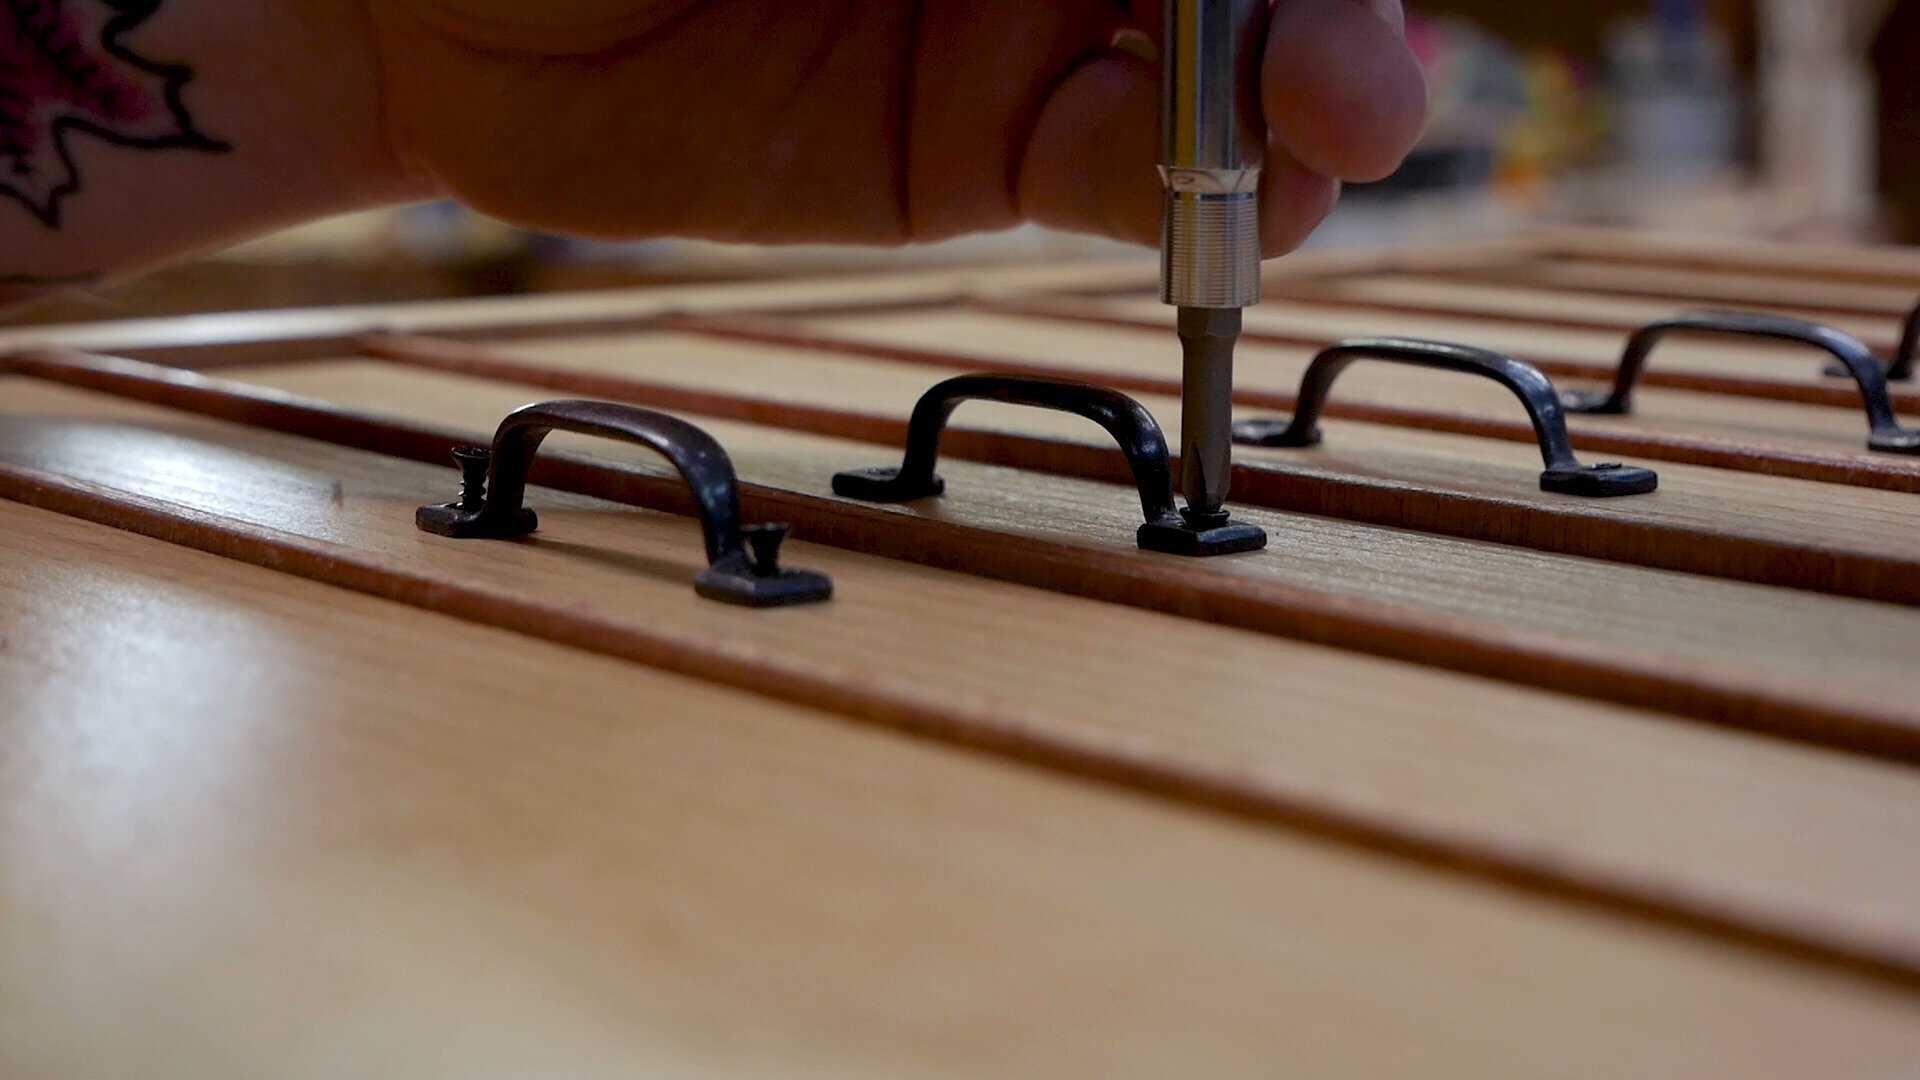
Vintage drawer pulls sourced from Old Portland Computer hardware here in Oregon.
Sentence to organize your tools in your new wooden tool chest!

With your DIY Tool Chest make out, it's prison term to mastermind your small tools, knick-knacks, and shop!
This was a same fun build that pushed my skills to the limit: solving problems, dealing with rough-sawn lumber, dovetails, faux-tenons, different styles of pants, etc.. Merely like a sho, I sustain a place for small tools that not only works well, but holds a truly astonishing amount of things in a selfsame small footprint. N
ot to mention I get that enthusiastic and fuzzy feeling every prison term I capable a drawer of, "Hey, I made this. Information technology works, and it looks good. and I'm the one that did it."
My only hope is that you finish building one, or something similar, and accept that same feeling of skill.
Keep up the good work, because there's good work in the making!

Craftsman 28 4 Drawer Tool Chest
Source: https://craftswright.com/blog/how-to-make-a-wooden-tool-chest-with-drawers
Post a Comment for "Craftsman 28 4 Drawer Tool Chest"